


Running the test
Hit F5 to compile the project and launch the test. Soon after the tesrun has started, you should see the following dialog indicating that a breakpoint has been hit:
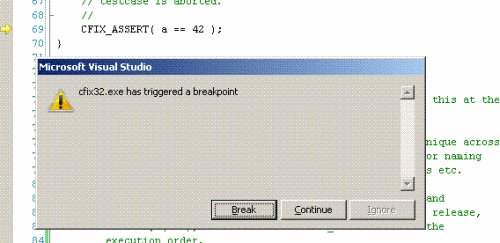
Click 'break' and you will see that the current the statement CFIX_ASSERT( a == 42 ) has fired --
which is not surprising as a has the value 17. Now open the output window (Ctrl+Alt+O) and you should
see the following output:
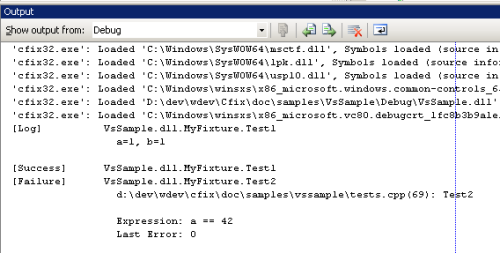
If you want to ignore this assertion, hit F5 and the fixture will run to completion.
Running the test in the debugger is nice, but it should also be runnable without a debugger attached. Therefore, hit Ctrl+F5 to start without debugger. You should see the following output:
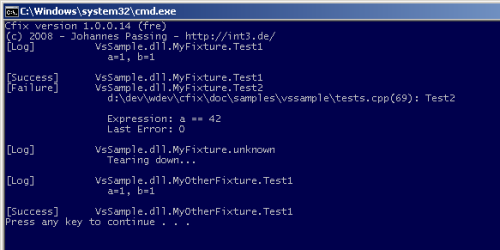
Note that this time, no breakpoint has been hit in the failing test case (Test2) -- instead, the failure
is logged and execution is resumed. Note that when run in the debugger, cfix by default logs output to the
Output Window. When run outside the debugger,
cfix logs output to the console. Of course, you can customize this
behaviour by providing appropriate command line switches.
This concludes the tutorial. Before beginning to write tests, have a look at the various command line switches that can be used to customize the behaviour of cfix. The distribution also contains a Visual Studio sample project that may serve as a starting point for further steps.
And finally, if you experience any problems with cfix, do not hesitate to ask!